Connection Guide
Instructions:
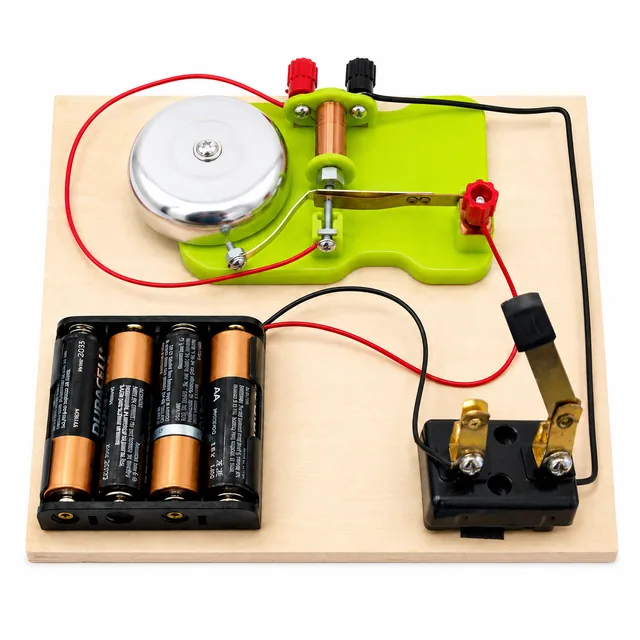
1. Drag from one contact point to another to connect them
2. The wire strips itself as you pull it
3. Make all four connections below
4. Close the switch — the bell rings on its own
Required Connections:
• Battery (-) → Switch Input (BLACK wire)
• Switch Output → Coil (-) black pole (BLACK wire)
• Battery (+) → Bell (+) red knob (RED wire)
• Contact screw → Coil (+) red pole (RED wire)
How the Bell Works
Complete Path: Electricity needs a complete loop to flow. It leaves the battery's positive terminal (+), enters the bell at the red knob, passes through the armature and the coil, and comes back through the switch to the negative terminal (-). The switch works just as well on the way back as on the way out — break the loop anywhere and the whole thing stops.
Electromagnet: Current through the coil turns it into a magnet. The magnet pulls the steel armature over, and the hammer on its end strikes the gong.
Make and Break: As the armature swings, it lifts off the adjustable contact screw and breaks its own circuit. With no current the magnet lets go, a spring pulls the armature back onto the contact, and it all starts again — about four times a second. That is why one push of the switch gives you a continuous ring instead of a single ding.
Why the fourth wire: The current has to arrive at the coil through the armature and the contact screw. Wire it straight to the coil instead and the magnet still works — it just pulls the armature over and holds it there, with nothing left to break the circuit. A silent bell, and a good demonstration of what that little screw is for.

 🛒 Buy the Electric Bell Kit